
Lab 08Publish your app to Render, then extend it
Your Library web app published from the editor to a new GitHub repository, deployed on Render's free tier, then extended with a Publisher concept and redeployed.
- Time
- 45 min
- Level
- Intermediate
- Runs with
- Browser, GitHub
- Do first
- Lab 7
You'll learn to
- Connect the editor to GitHub and publish a project as a new repository
- Explain what the generated repository and its Render Blueprint contain
- Deploy the backend, frontend and agent services on Render's free tier
- Change the models, update the same repository and redeploy
You'll need
- The Library App project from the web-app lab (or its JSON export)
- A GitHub account
- A free Render account (you can sign up with GitHub)
Files for this lab
In the web-app lab you ran the generated application on your own machine. Here you put
the same application on the internet. The editor generates the code, pushes it to a new repository in your
GitHub account together with a render.yaml Blueprint, and Render builds and hosts the three services that
Blueprint describes.
Then you do what real projects do next: change the requirements. You add publishers to the domain model, teach the agent a new question, update the GUI and publish again to the same repository.
Open the project and check the models
- Open editor.besser-pearl.org in the same browser you used for the
web-app lab. Projects live in the browser’s storage, so
Library Appis still there: open it with File > Open Project. If you use a different browser, download the starting project and open it with File > Import > Project file (.json / .py). - Run Quality Check on the Class and on the Agent diagram. Both report “Diagram is valid”.
- Open the GUI editor and check that the Book page still has the Library assistant widget with
Greeting Agentselected in its Agent field.
Connect GitHub
- Open the Deploy menu. While you are not signed in, it shows two items.
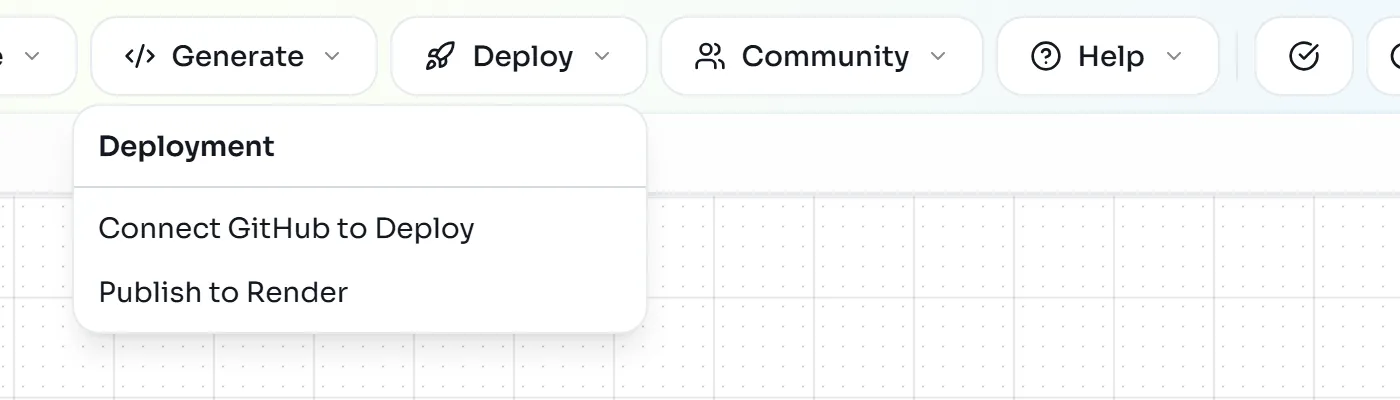
If you click Publish to Render now, the editor only shows a reminder:

- Click Deploy > Connect GitHub to Deploy (or the GitHub icon in the top bar). The editor redirects you to GitHub.
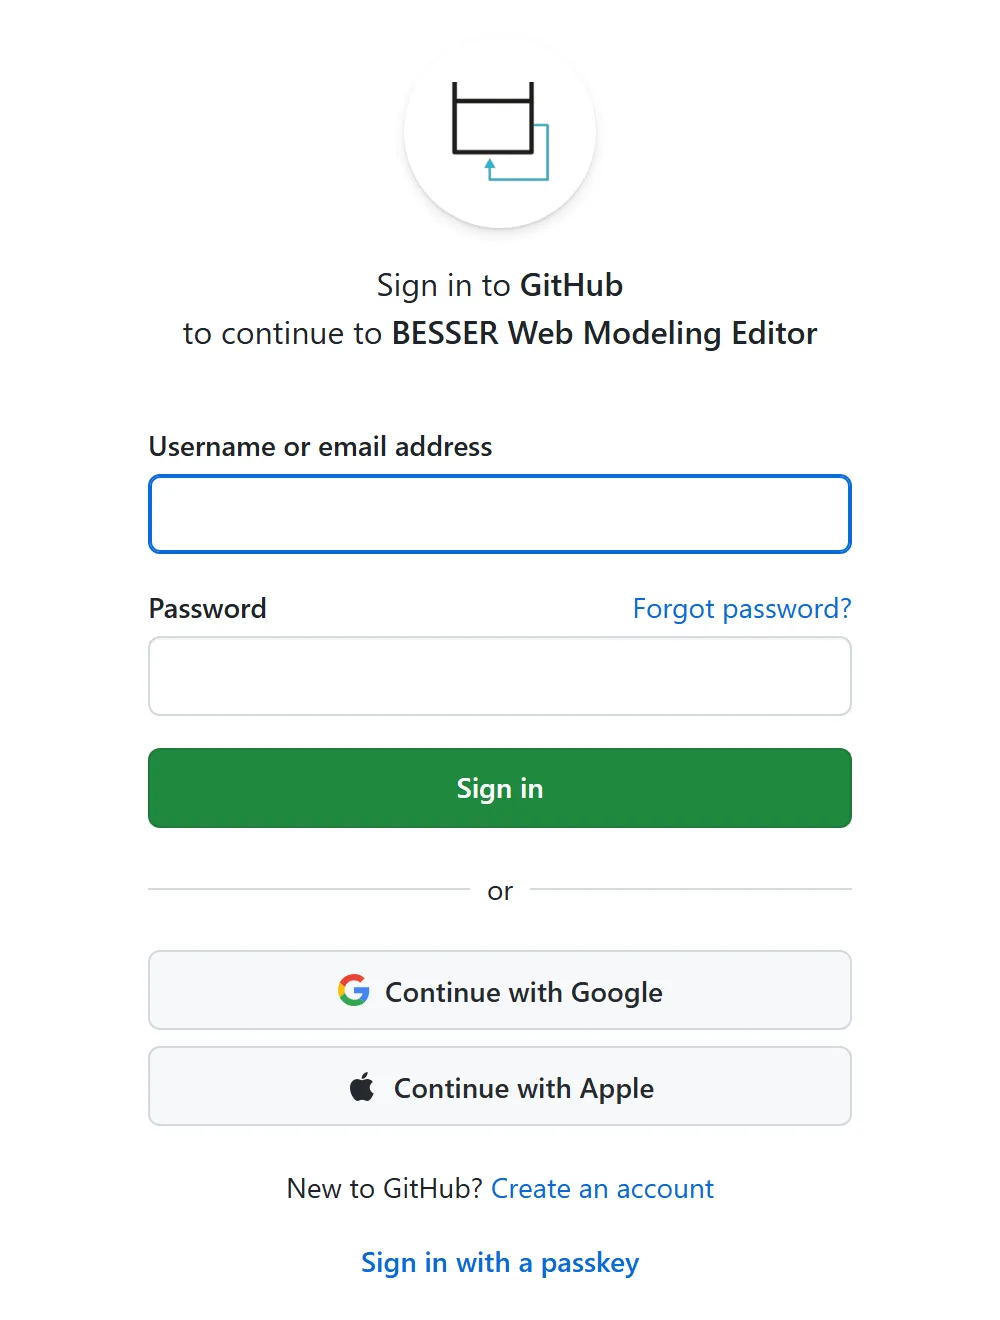
- Sign in and authorize the application. It asks for the
repo,gistanduserscopes, because it creates repositories and pushes code on your behalf. - Back in the editor, a toast says “Signed in as” followed by your GitHub user name.
Publish the project to a new repository
- With the Class or GUI diagram open, choose Deploy > Publish to Render. The Publish to Render dialog opens with the text “Create a GitHub repository from the current project and deploy it on Render.”
- Fill in the fields:
- Deployment Target: Web App (Class + GUI). This field only appears when the project could also be published as a Standalone Agent.
- Repository Name: proposed from the project name in lower case, here
library_app. Use something unique in your account, such aslibrary-app-lab. - Description: defaults to “Web application generated by BESSER”.
- Make repository private: leave it off. The dialog warns that private repositories may require manual Render permission setup.
- Click Publish to Render. The button reads “Publishing…” while the editor generates the code and pushes it.
- The result dialog is titled Repository Created Successfully. It shows
<your-user>/<repository>, the number of files uploaded, and two buttons: Open Render Deployment and View GitHub Repository.
Inspect the generated repository
Click View GitHub Repository. The commit pushed by BESSER is called “Initial commit - Generated by BESSER Web Editor”, and the repository contains:
library-app-lab/
├── README.md              overview, project structure and a Deploy to Render button
├── render.yaml            the Render Blueprint
├── docker-compose.yml     the local setup you used in the web-app lab
├── BESSER_GENERATION.md   BESSER version and generator used
├── backend/               FastAPI + SQLAlchemy
├── frontend/              React + TypeScript (Vite)
├── agents/
│   └── greeting_agent/    the BESSER Agentic Framework agent
└── buml/
    ├── domain_model.py    the class diagram as B-UML Python code
    ├── gui_model.py       the GUI model as B-UML Python code
    ├── agent_model_greeting_agent.py
    └── diagrams.json      the project, re-importable in the editor
Open render.yaml. It declares one service per part of the application. This is its shape (names are
shortened; yours contain the repository name and a six-character suffix):
services:
  # Backend API (Free tier - 750 hours/month, spins down after 15 min idle)
  - type: web
    name: library-app-lab-backend-<suffix>
    runtime: python
    plan: free
    buildCommand: pip install -r backend/requirements.txt
    startCommand: cd backend && uvicorn main_api:app --host 0.0.0.0 --port $PORT

  # Frontend (Free static site)
  - type: web
    name: library-app-lab-frontend-<suffix>
    runtime: static
    buildCommand: cd frontend && npm install && npm run build

  # Agent Service: Greeting_Agent (Free tier - WebSocket-based AI agent)
  - type: web
    name: library-app-lab-greeting-agent-agent-<suffix>
    runtime: python
    plan: free
The frontend is built with the backend’s and the agent’s public onrender.com addresses, and the agent’s
start command rewrites its config.yaml to listen on 0.0.0.0 and Render’s port. That is why the
host: 0.0.0.0 edit from the web-app lab is not needed on Render.
Deploy the Blueprint on Render
- Back in the editor, click Open Render Deployment. It opens Render’s deploy page for your repository
(
https://render.com/deploy?repo=https://github.com/<your-user>/<repository>). The Deploy to Render button in the repository’s README opens the same page. - Sign in to Render (signing in with GitHub is the simplest) and, if Render asks, give it access to the new repository.
- Enter a Blueprint Name, keep the Branch
mainand the default Blueprint Pathrender.yaml, review the three services, and click Deploy Blueprint.
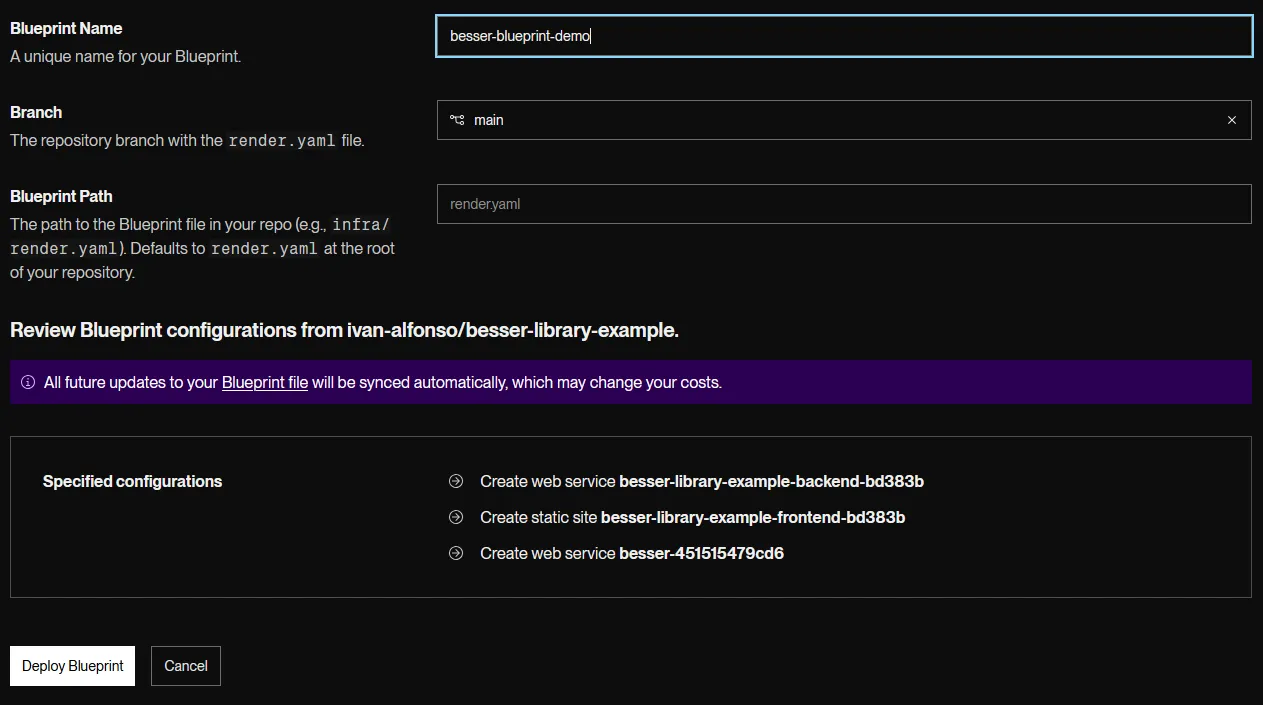
- Wait. On the free plan the three services take between 4 and 12 minutes to build and start. Render shows the progress of each service.
- When all three are live, open the frontend service (its name contains
-frontend-) and click itsonrender.comaddress.
The app is the one you ran locally, but empty: the Render backend has its own SQLite database. Add a
library, an author and a book through https://<backend-service>.onrender.com/docs, exactly as in the
web-app lab, and reload the frontend.
Extend the domain, the agent and the GUI
The library now needs to track publishers. A publisher has a name, a country and a founding year; it publishes many books, and each book has one publisher. The application must also compute the average price of a publisher’s books.
- Class diagram. Add a
Publisherclass withname: str,country: strandfounded: int. Connect it to Book with an association: multiplicity1on the Publisher end and*on the Book end. - Add the method. In the Publisher properties panel, click Code under METHODS, rename the new method
to
average_book_price(): float, set TYPE to Python Code, and write the body in the Python Implementation editor:
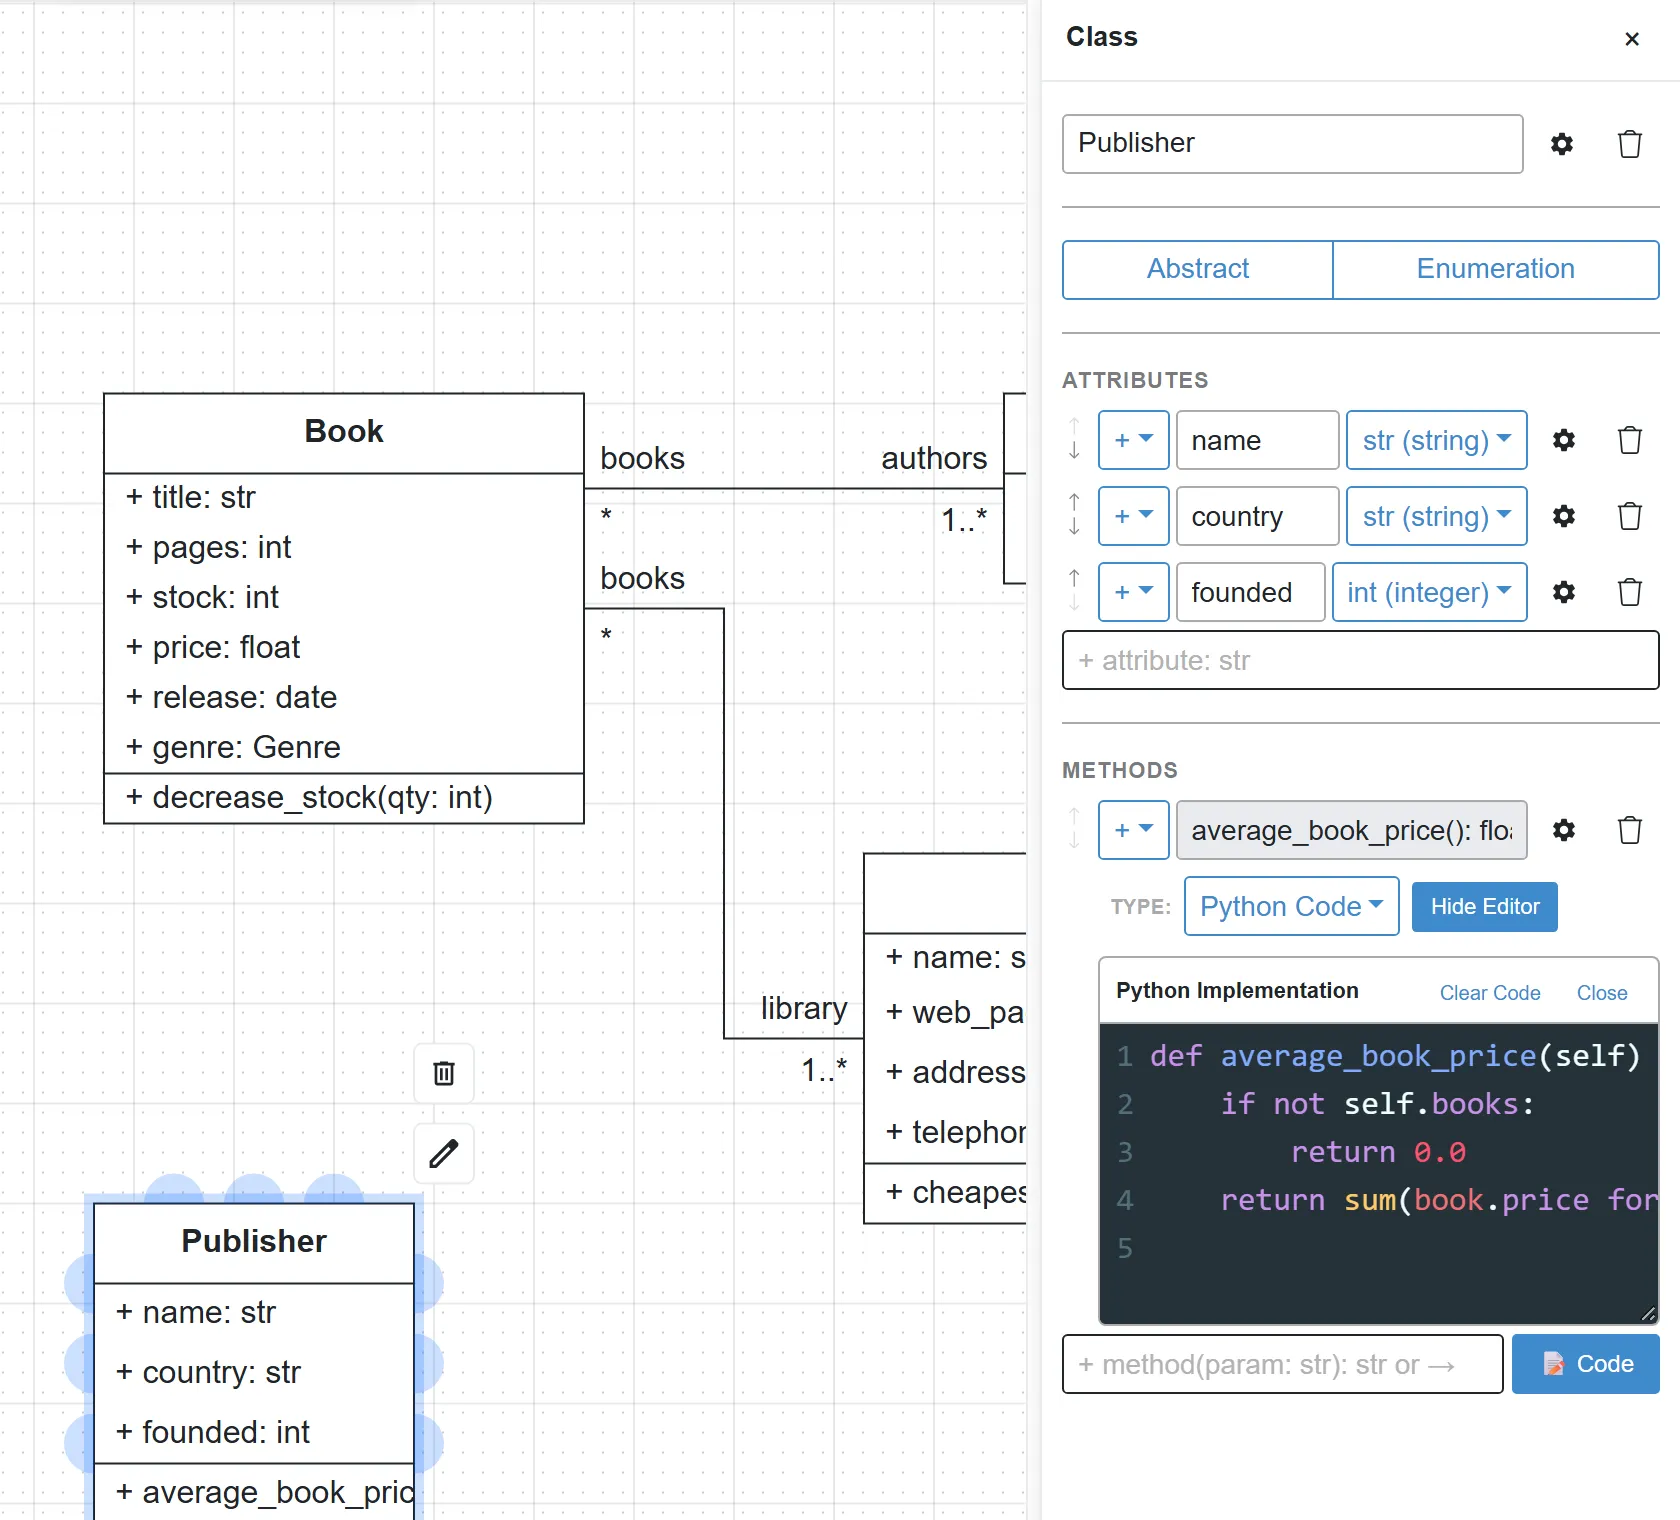
The code in the screenshot:
def average_book_price(self) -> float:
    if not self.books:
        return 0.0
    return sum(book.price for book in self.books) / len(self.books)
Run Quality Check. If you prefer the BESSER Action Language, the Library class’s cheapest_book_by
method is an example of its syntax.
- Agent. Open Agent > Components and, in the Intents section, click Add Intent.
Name it
publisher_price_intentand use Add sentence to add, for example:how can I get the average price of books from a publisher?average book price for a publisherhow do I compute the publisher average price?
- In the Agent diagram, add a state
publisher_helpwhose body is a Text reply such as “Open the Publisher page, select a publisher in the table and click average_book_price.” Draw a transition frominitialtopublisher_help, open it, choose Intent Matched and the new intent. Draw a second transition frompublisher_helpback toinitialof type Auto. - GUI. Run Auto-Generate GUI from Class Diagram again. It creates the new Publisher page with its table and an average_book_price button.
Redeploy and test the changes
- Choose Deploy > Publish to Render again. Because the project is linked to the repository, the dialog now says “Update the existing repository with your latest changes.”, shows “Previously deployed to:” with your repository, and offers a Commit Message field (leave it empty for the default “Update app - Generated by BESSER Web Editor”). Files you added to the repository by hand are kept.
- Click Update & Publish. The result dialog is titled Repository Updated Successfully and offers Open Live App, Open Render Blueprint and View GitHub Repository.
- Render normally redeploys after a push. If your changes do not appear after a few minutes, open the Blueprint on Render and click Manual Sync: it redeploys every service from the latest commit.
- Open the live app and check that:
- the Publisher page exists and you can create a publisher;
- after you create books for that publisher through the API (the book body now also needs the publisher’s
id; the
BookCreateschema in Swagger shows the field name), average_book_price returns their average price; - the agent answers “average book price for a publisher” with your instructions.
Exercise: keep evolving the application
Show a solution
book_count can reuse the same association end as average_book_price (len(self.books)). Remember the
order of the GUI work: auto-generate first, then re-add the widgets that auto-generation removes.
Show a solution
The dialog proposes a repository name ending in -agent, and the button reads Publish Agent to Render.
Look at how many services the agent Blueprint declares and which user interface it starts.