

Lab 05From a description to a running app with the Spec-Driven Agent
A generated full-stack web app for a small event-ticketing model, downloaded, run on your machine, and optionally pushed to GitHub and reopened for further changes.
- Time
- 1 h
- Level
- Intermediate
- Runs with
- Browser, Docker, GitHub
- Do first
- Lab 4
You'll learn to
- Start a Spec-Driven Agent run from a reviewed model with an explicit request
- Choose between the keyless free tier and your own API key, and cap the cost of a run
- Read the run card, its phases, the scaffold badge and the verification findings
- Download the generated application and run it locally
- Iterate on the generated app and continue from a GitHub repository
You'll need
- A modern desktop browser
- Lab 4 (Model by conversation) or equivalent experience with the Modeling Assistant
- To run the result: Docker Desktop (or Docker Engine with Compose v2), or Python 3.11+ and Node.js 20+
- Optional: a GitHub account, for Push to GitHub and Continue from GitHub
The Generate menu runs one deterministic generator over one diagram: the same model always gives the same files. The Spec-Driven Agent goes further. It starts from that deterministic scaffold, lets a language model fill the gaps your request asks for (a React frontend, extra pages, authentication, Docker files), and then validates the result and repairs what it can. You start it from the assistant chat, watch it work in a run card, and download a complete codebase.
In this lab you describe a small event-ticketing system, review the model, ask for the web app, and then run what comes out on your own machine. You also learn where the agent’s limits are, because they decide how much you can trust the result.
Describe the system and review the model
The agent builds the application from the model, so the model has to be right first.
- Open https://editor.besser-pearl.org, click Start describing on the Describe it card, name the project
Event Ticketingand click Create Project. (If you land on the canvas instead, use File > New Project and choose Agentic.) - Send this prompt:
Create a class diagram for a small event ticketing system with the classes Venue, Event and Ticket. An event takes place at exactly one venue, a venue hosts many events, and an event has many tickets. Give each class a few attributes, including a price on Ticket.- When the reply arrives, click Review the model. The workspace closes and you see the class diagram on the canvas.
- Check the model as in Lab 4: three classes, typed attributes, an association
Venue1 to manyEvent, and an associationEvent1 to manyTicket. Fix anything wrong with a follow-up prompt or directly on the canvas. - Click Quality Check and resolve any errors.
Creating or editing a model never starts a generation run. The editor always waits for an explicit request.
Decide how the run is paid for and set a budget
A run uses a language model for the customisation and repair phases. There are two ways to pay for it.
- No key (free tier). If you have not saved an API key, the first run silently uses the server-hosted free tier. No dialog opens, no account is needed, and the run card says the run had no cost. The server picks the free model, and quality is lower than with paid providers. It runs on shared hardware, so use it for real work, not for repeated test runs.
- Your own key. If you saved a key, the run starts immediately and is billed to that key.
- Open the key dialog from the workspace: click API key in the bottom bar of the chat (or the Change the model link under the composer, or Settings > AI / LLM API Key in the sidebar). The dialog is titled Use your own API key.
- Look at the Provider list. It contains Free — included, no key required next to Anthropic, OpenAI, Mistral and Nebius. The free option applies to the Spec-Driven Agent only.
- Expand Spec-Driven Agent settings. It holds Max spend / run (USD) and Max time / run (min). On the hosted editor both default to the server’s ceiling, “Up to $5 and 40 min per run”, and the server enforces those caps whatever you type.
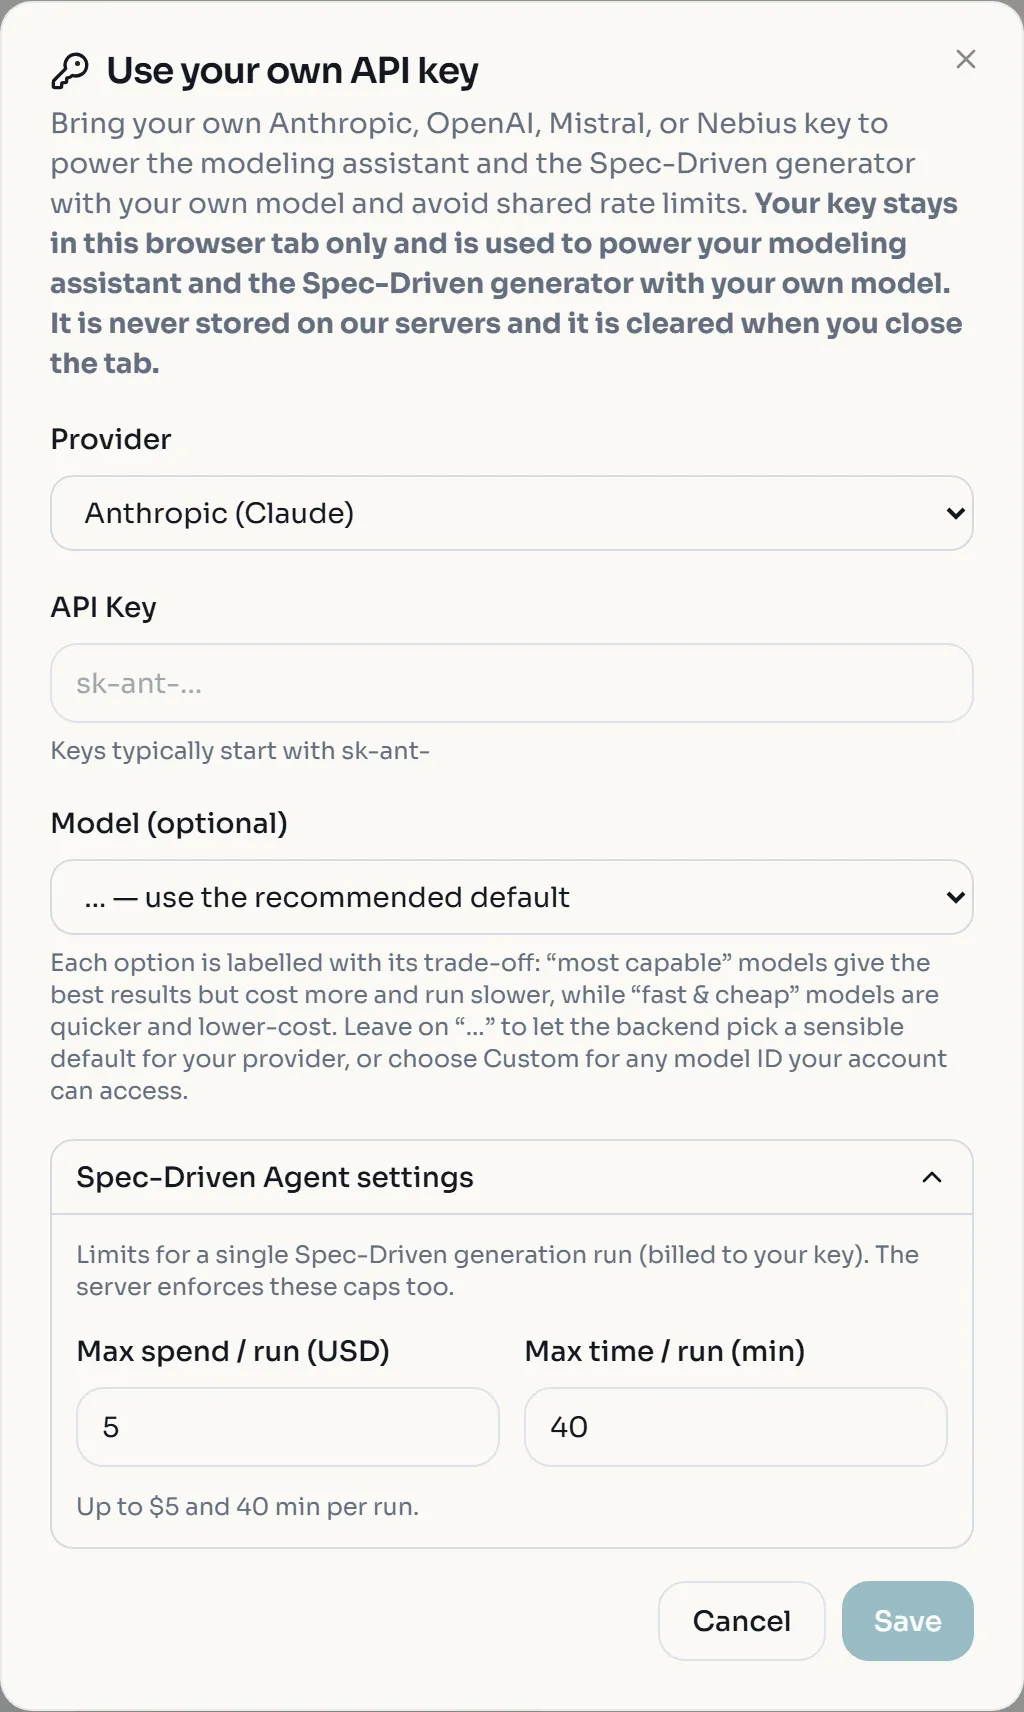
- For this lab, use the free tier: click Cancel without entering a key. If you do want to use your own key, enter it, lower Max spend / run (USD) (for example to 1), and click Save.
Ask for the web app and watch the run card
- Click Describe your app at the top of the canvas to reopen the chat.
- Type the request exactly and press Enter:
generate the web app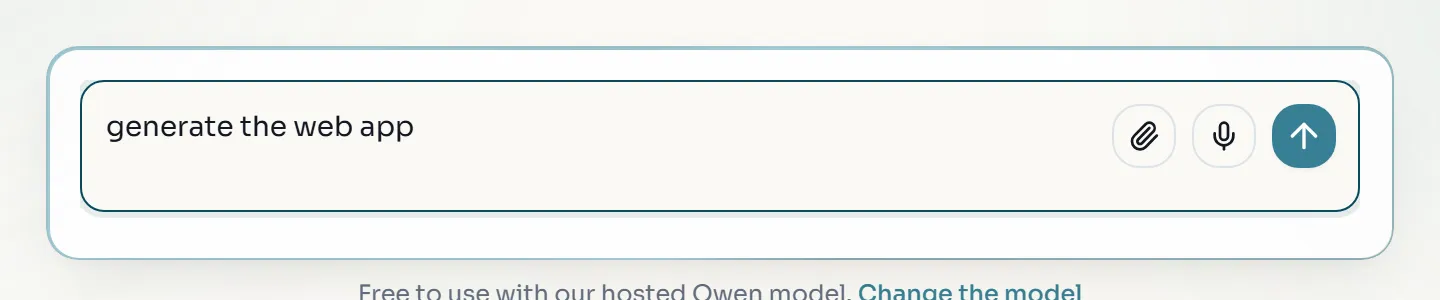
Instead of typing, you can click a Generate web app or Generate application chip if the assistant offered one under its last reply. A request for an app, a web app, a UI or a dashboard always gets a frontend, even when the project has no GUI diagram.
- A run card appears in the chat. While it runs it shows:
- a phase list that ticks off in order: Selecting generator, Running deterministic generator, Analysing gaps, Customising output, Validating;
- a Working… strip with the elapsed time against the runtime budget (after about 45 seconds it reminds you that big steps take a few minutes);
- streamed commentary from the model;
- a red Stop button.
- Let it run. A run takes several minutes; the hosted runtime cap is 40 minutes. You can keep working in another tab. Reloading the page does not cancel the run: the editor reattaches to it and replays what you missed.
- Stop ends the run (the button reads “Stopping…” while it winds down). The card then reports
CANCELLED. Only one run can be live per tab; a second request gets “Spec-Driven Agent is already running — please wait for it to finish or click Stop.”
Read the finished run card
When the run ends, the card collapses to one line.
- Read the status. Application ready means the run finished without unresolved blockers. Other outcomes are Generated — incomplete (with a count of unresolved blockers), Delivered — rules not enforced (a rule from your model was checked and found missing in the code), or an error code:
COST_CAP,TIMEOUTorINCOMPLETEkeep partial output;UPSTREAM_LLM,INTERNALorBAD_REQUESTmean a provider or backend failure, so retry;INVALID_KEYclears your key. - Next to the status you see the generator the run started from and the file count.
- Click the badge that reads “N% files unchanged from scaffold”. It opens How this was built: the share of scaffold files the run did not edit, the share BESSER generated and the model then edited, and the share the model wrote from scratch. This is provenance, not a quality score. A high percentage means more of the app is deterministic BESSER output that follows your model exactly; the rest was written by a language model and deserves a closer review.
- Click Show steps to expand the phase timeline and the model’s commentary again. Hide steps collapses it.
- Read the verification findings on the card. They are grouped as Not enforced, Could not verify and Verified. “Could not verify” means unknown, not absent: the check could not run, so you have to test that part yourself.
Download the application and run it locally
- Click Download on the card. The button changes to Download again. Nothing is written to your machine until you click, and the archive stays on the server for about 30 minutes, so download it now.
- Unzip the archive (named like
besser_smart_<run id>.zip) into an empty folder. - Open
BESSER_GENERATION.mdat the top level. It records the BESSER version, the generatorspec_driven_agent, the base generator and the language model that the run used. Keep it with the code. - Open
README.mdif there is one, and follow its run instructions; they describe this particular output. The layout depends on the run, so check which case you have:
Case A: there is a docker-compose.yml at the top level. With Docker running:
docker compose up --buildThe web app is at http://localhost:3000, the API at http://localhost:8000, and the interactive API documentation at http://localhost:8000/docs. Stop it with Ctrl+C, then docker compose down.
Case B: no compose file. Run the backend and the frontend in two terminals. Replace backend and frontend with the folder names in your archive (the folder that contains main_api.py and requirements.txt, and the folder that contains package.json):
cd backend
python -m venv .venv
source .venv/bin/activate
pip install -r requirements.txt
python main_api.py
cd backend
python -m venv .venv
.venv\Scripts\Activate.ps1
pip install -r requirements.txt
python main_api.pycd frontend
npm install
npm run devThe backend listens on port 8000 and the Vite dev server on port 3000.
- Open http://localhost:3000, create a venue, an event for it and a ticket, and check that the lists update. Then open http://localhost:8000/docs and confirm there are endpoints for each class of your model.
Iterate on the generated app
While the previous run is still held on the server (about 30 minutes after it finished), a follow-up request edits that application instead of rebuilding it.
- In the same project’s chat, send:
add a search page for events by name- The agent starts a new run in modify mode: it seeds the workspace with the previous output and changes it. This is a second run, with the same cost rules as the first (free tier, or billed to your key).
- Download the new archive and compare it with the first one. Only the files related to the search page should have changed.
Push to GitHub and continue from the repository
This step is optional and needs a GitHub account.
- On a finished run card, click Push to GitHub. If you are not signed in, the editor first sends you through GitHub sign-in and reopens the dialog when you come back.
- In the Push to GitHub dialog choose Create new repo, enter a Repository Name (for example
event-ticketing-app), an optional Description, tick Private repository if you want, and click Push to GitHub. If the name already exists, the dialog tells you to push to it as an existing repository instead; Use existing repo pushes a later run into the same repository with Push update.
- Open the repository on GitHub and check that it contains the application and
BESSER_GENERATION.md. - Later, or on another computer, reopen it: choose File > Import > From GitHub, or click Continue from GitHub in the project hub (on the first-run screen, More options opens the hub).
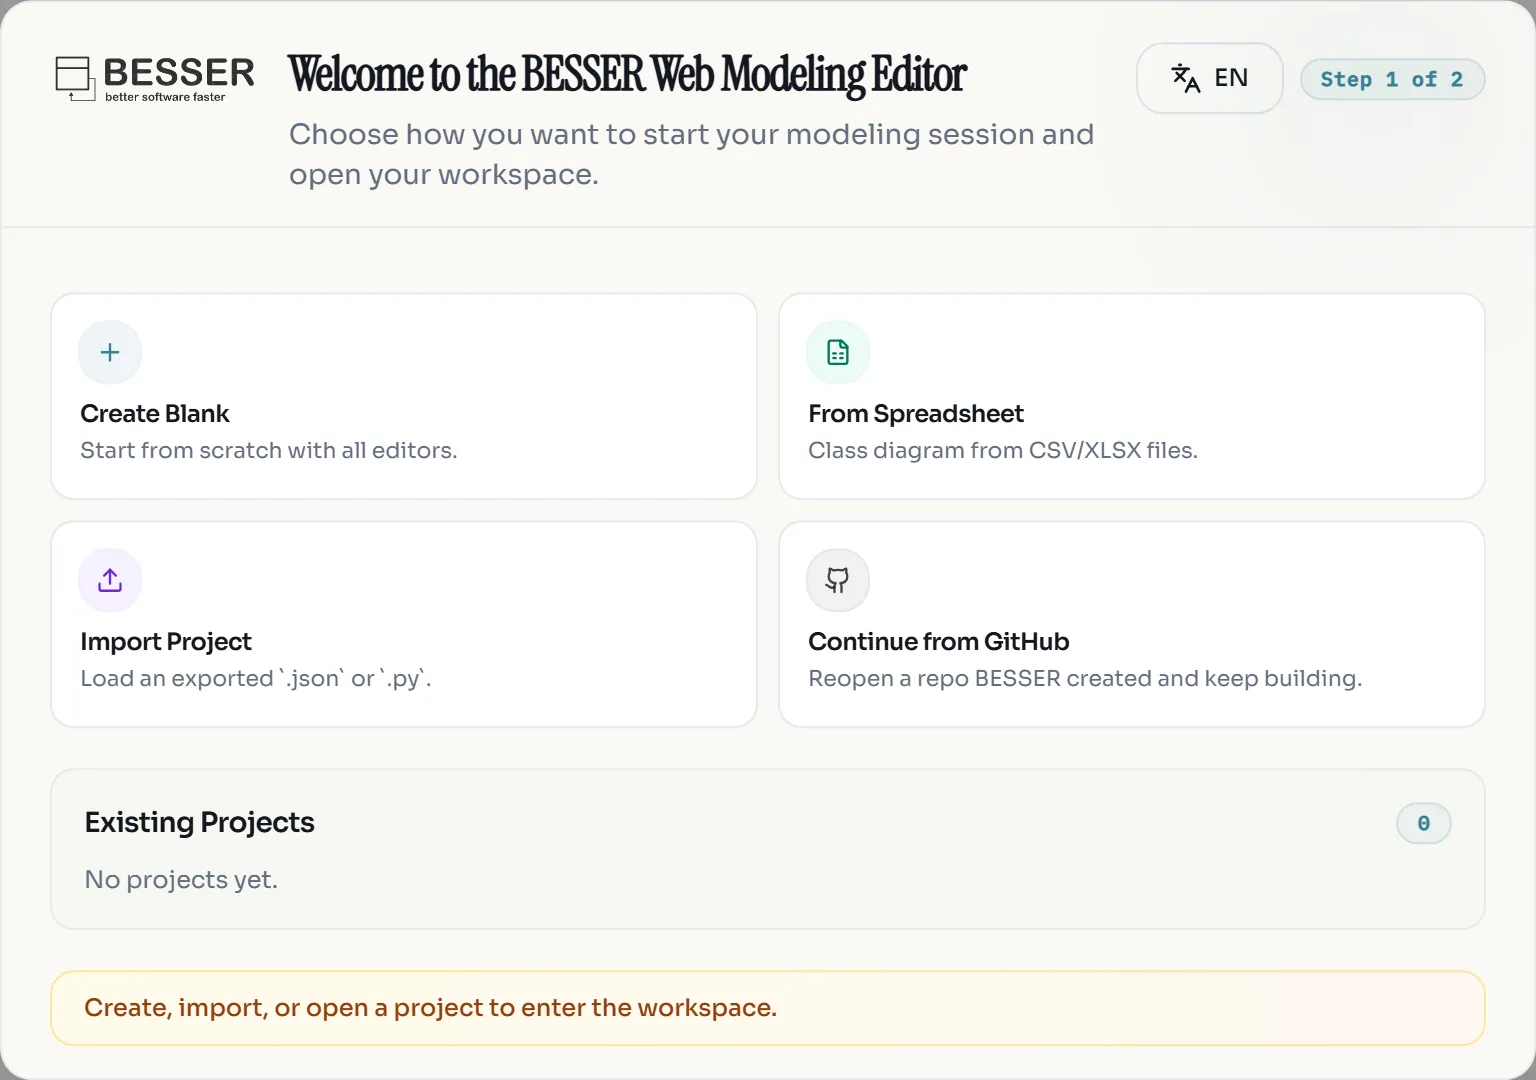
- Pick the repository and branch. The editor imports the model stored in the repository as a new project and links the repository, so your next request (“add a search page”, “add an organiser to events”) edits that application. A repository BESSER did not create is rejected with “This repo has no BESSER model — it wasn’t created by BESSER, so there’s nothing to continue from yet.” Importing never overwrites the project you have open.
You can also ask in the chat: continue from github.com/<owner>/<repo>.
Exercise: change the model, not only the code
Show a solution
Look at the files BESSER generates deterministically first (the ORM models, Pydantic classes and routers): their changes should all trace to Customer and the new association. Differences elsewhere, for example in LLM-written frontend pages, are the non-reproducible part. The ”% files unchanged from scaffold” badge and How this was built help you tell the two apart.
Show a solution
The deterministic backend is reproducible and follows the model exactly, which makes it easy to regenerate after a model change. The agent’s version may add a frontend, extra endpoints or configuration that the templates do not produce, at the cost of review effort and reproducibility.